
Introduction
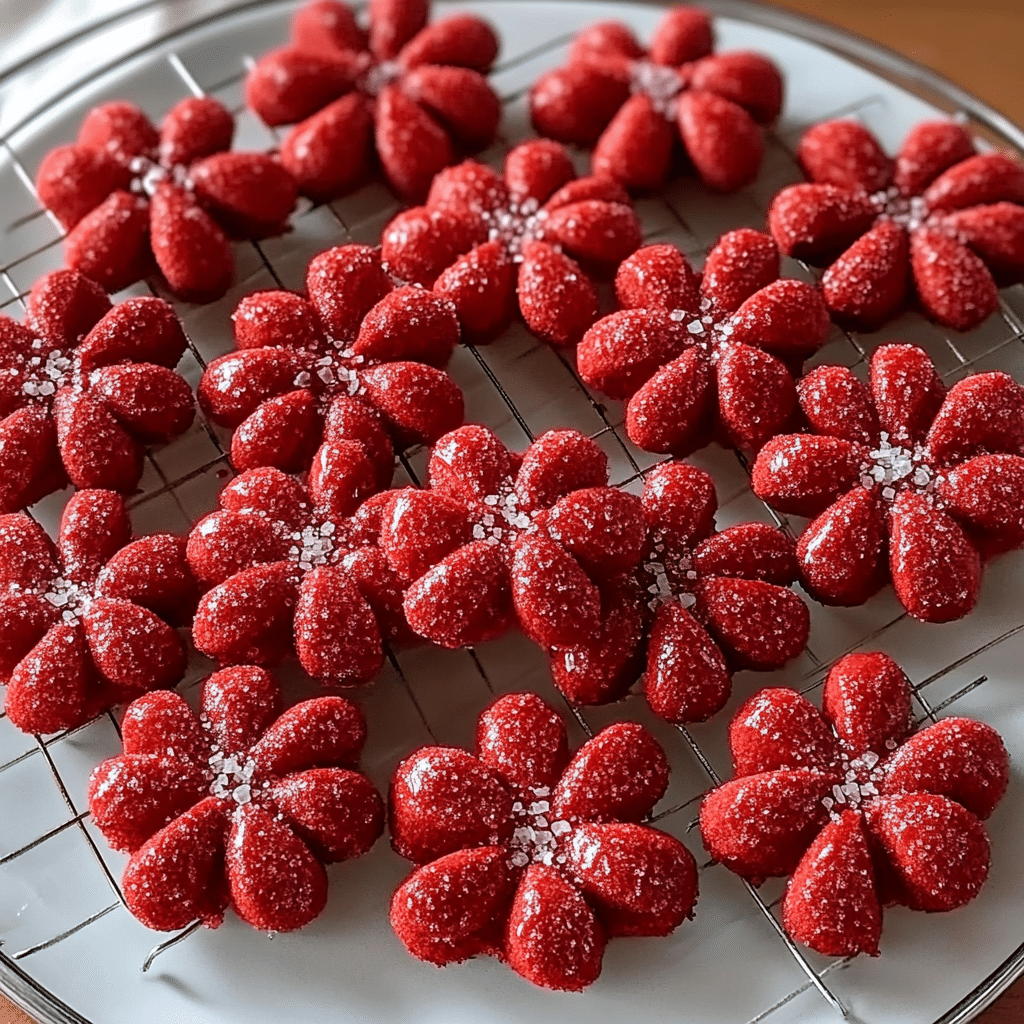
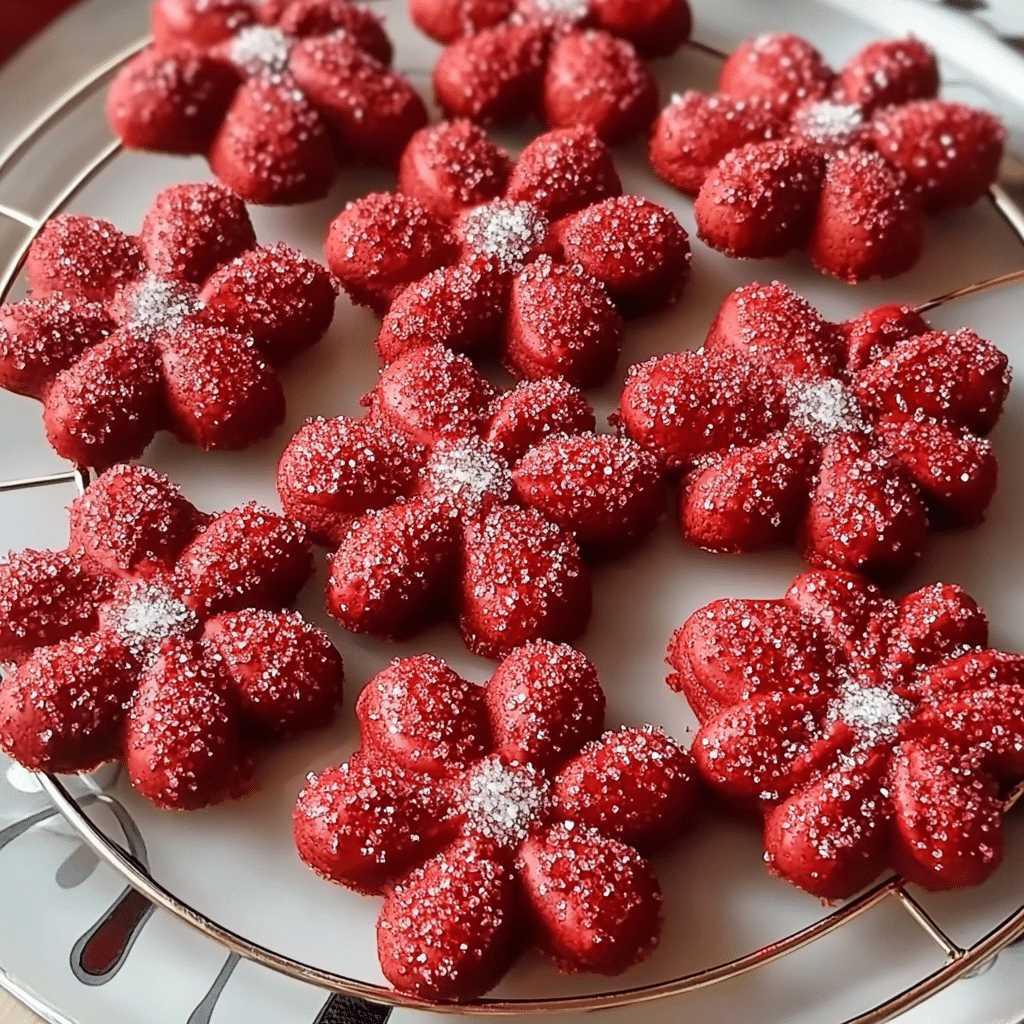
Red Velvet Spritz Cookies are a stunning, festive twist on the classic spritz cookie. With their vibrant red hue, buttery texture, and hint of cocoa, these cookies offer a perfect combination of elegance and decadence. Their delicate shapes and eye-catching color make them an irresistible addition to any holiday spread, dessert tray, or special celebration.
I first made Red Velvet Spritz Cookies to add a pop of color and festive flair to a holiday cookie platter. The rich, velvety taste of cocoa paired with the classic buttery spritz texture creates a delightful contrast that’s both decadent and satisfying. Whether piped into intricate shapes or simply formed into rounds, these cookies bring both beauty and taste to every bite.
What I love about this recipe is its versatility and charm. You can add a touch of cream cheese frosting on top, sprinkle with red sugar crystals for a festive sparkle, or even add mini chocolate chips for extra texture. Whether gifted in decorative tins, displayed on a dessert table, or enjoyed with a cozy cup of tea, Red Velvet Spritz Cookies offer a beautiful and delicious way to celebrate any occasion.
Perfect for:
- Holiday celebrations
- Birthday parties
- Valentine’s Day
- Festive gatherings
- Cookie trays and gifting
Why You’ll Love This Recipe
Here are 10 reasons why these Red Velvet Spritz Cookies will become your go-to cookie indulgence:
- Eye-Catching Color: The bright red hue adds a festive and fun pop of color to any dessert table.
- Buttery Flavor: The rich buttery taste is balanced with the subtle sweetness of red velvet.
- Soft and Tender Texture: These cookies have a melt-in-your-mouth texture that’s simply irresistible.
- Perfect for Gifting: Share the holiday spirit by gifting these beautiful cookies to loved ones.
- Classic Yet Unique: A fun twist on the traditional spritz cookie for something memorable.
- Easy-to-Make Recipe: A simple, fuss-free recipe that anyone can follow.
- Customizable Decor: Add sprinkles, icing, or white chocolate drizzle for creative flair.
- Festive Appeal: Great addition to cookie platters, party trays, and holiday tables.
- Less Mess, More Fun: Minimal cleanup, so you can focus on enjoying your baking time.
- Timeless Appeal: Loved by both kids and adults—perfect for any age group.
Preparation and Cooking Time
- Total Time: 1 hour
- Preparation Time: 20 minutes
- Baking Time: 10 minutes
- Chilling Time: 30 minutes
- Servings: Approximately 24 cookies
- Calories per serving: Approximately 90-100 calories
- Key Nutrients: Fat: 5g, Carbs: 12g, Protein: 1g
Ingredients
For the Red Velvet Spritz Dough:
- 1 cup unsalted butter, softened
- 1 cup granulated sugar
- 2 large eggs
- 1 teaspoon vanilla extract
- 2½ cups all-purpose flour
- 2 tablespoons unsweetened cocoa powder
- 1 teaspoon baking powder
- 1/2 teaspoon salt
- Red food coloring (gel or liquid)
Optional Garnishes:
- White chocolate drizzle
- Red or holiday-themed sprinkles
Ingredient Highlights
- Red Food Coloring: Adds a vibrant pop of color to these festive cookies.
- Unsalted Butter: Creates a rich, buttery flavor and tender crumb.
- Vanilla Extract: Enhances the overall sweetness and aroma of the dough.
- Cocoa Powder: Adds a subtle richness to complement the red velvet flavor.
Step-by-Step Instructions
Prepare the Dough:
- Cream Butter and Sugar: In a large bowl, beat the butter and sugar until light and fluffy using an electric mixer.
- Add Eggs and Vanilla: Beat in the eggs one at a time, followed by the vanilla extract.
- Combine Dry Ingredients: In a separate bowl, whisk together flour, cocoa powder, baking powder, and salt.
- Mix Dough: Gradually add the dry ingredients to the wet ingredients, mixing until fully incorporated.
- Add Food Coloring: Stir in red food coloring to achieve your desired intensity of color.
Chill the Dough:
- Refrigerate: Wrap the dough in plastic wrap and chill for at least 30 minutes in the refrigerator.
Shape and Bake the Cookies:
- Preheat Oven: Preheat your oven to 350°F (175°C). Line baking sheets with parchment paper.
- Prepare Spritz Tool: Fill your cookie press or spritz tool with the dough and shape the cookies onto the prepared baking sheets.
- Bake: Bake for 10 minutes, until the edges are just set but not browned.
- Cool: Let cookies cool on the baking sheets for 5 minutes before transferring them to wire racks.
Garnish (Optional):
- Drizzle or Decorate: Melt white chocolate and drizzle it over the cookies, or add festive sprinkles for decoration.
How to Serve
Here are 10 serving suggestions for Red Velvet Spritz Cookies:
- Holiday Cookie Trays: Perfect for festive cookie platters during Christmas or Valentine’s Day.
- Gifting Delight: Pack cookies in gift boxes with ribbons for thoughtful presents.
- As Party Favors: Serve on trays at birthday parties or corporate events.
- With Tea or Coffee: Pair cookies with a warm cup for a delightful snack break.
- Dessert Buffets: Add them to dessert tables at weddings or anniversaries.
- Valentine’s Treat: Serve as a romantic treat to celebrate love and sweetness.
- Layered Desserts: Use cookies as a base layer in parfaits or trifle desserts.
- Sprinkle Showering Fun: Add icing, sprinkles, or colored sugar for creative flair.
- Breakfast Treat: A unique addition to brunch buffets alongside muffins and scones.
- Mini Cookie Stands: Create a mini cookie stand display for events or parties.
Additional Tips
- Chill the Dough: Ensure the dough is properly chilled before using your cookie press. This helps maintain the shape and prevents spreading.
- Use Gel Food Coloring: Use gel food coloring for a more vibrant red color. Gel coloring is more concentrated and doesn’t alter the dough’s consistency.
- Room Temperature Ingredients: Make sure your butter and eggs are at room temperature, as this allows for better incorporation and a smoother dough texture.
- Measure Flour Accurately: Use the spoon-and-level method to measure flour accurately. Adding too much flour can make the cookies dry and crumbly.
- Use a Quality Cookie Press: A sturdy and well-maintained cookie press makes it easier to press out consistent shapes and designs.
- Add Vanilla Extract: A teaspoon of vanilla extract enhances the flavor of your red velvet cookies and complements the cocoa taste.
- Parchment Paper or Silicone Mats: Bake cookies on parchment paper or silicone baking mats to prevent sticking and ensure even baking.
- Experiment with Decorations: After baking, add decorative touches like white icing, sprinkles, or red sanding sugar to make your cookies pop!
- Test Your Cookie Press First: Do a test press on parchment paper to ensure the dough is the right consistency and your designs come out clean.
- Store Properly: Keep your cookies in an airtight container at room temperature for up to a week, or freeze them for longer storage while preserving freshness.
Recipe Variations
- Red Velvet White Chocolate: Drizzle white chocolate over cookies for a decadent twist.
- Sprinkle Surprise: Use colored sprinkles to match holidays or special events.
- Gluten-Free Version: Swap the flour for a 1:1 gluten-free flour blend.
- Double Chocolate Twist: Add mini chocolate chips to the dough for extra chocolate goodness.
- Berry Infused: Incorporate freeze-dried raspberries for a fruity surprise.
Special Equipment
- Cookie Press/Spritz Tool: For creating the unique shape and pattern of spritz cookies.
- Piping Bag: Optional for decorative icing details.
- Baking Sheets and Parchment Paper: For even baking and easy cleanup.
- Wire Cooling Racks: Essential for properly cooling baked cookies.
FAQ Section
- Can I use gel food coloring instead of liquid?
Yes, gel food coloring is ideal for achieving a more vibrant and consistent red hue. - How long can I store these cookies?
Store them in an airtight container at room temperature for up to 1 week. - Can I freeze these cookies?
Yes, you can freeze cookies for up to 2 months; thaw in the refrigerator before serving. - What if my cookies lose their shape during baking?
Chill the dough well before shaping, and make sure your baking temperature is accurate. - Can I customize the shape of the cookies?
Yes, use various cookie press discs to create different shapes and patterns. - Do these cookies require a lot of preparation time?
No, they are quick to make with minimal prep and simple steps. - What substitutes can I use for cocoa powder?
You can use Dutch-processed cocoa powder for a richer chocolate flavor. - Can I make these cookies dairy-free?
Yes, use a plant-based butter substitute or coconut oil. - Do I need to use a cookie press?
Not necessarily; you can shape the cookies by hand if you don’t have a press. - What toppings work best for decoration?
White chocolate, sprinkles, and edible glitter make excellent toppings.
Conclusion
Red Velvet Spritz Cookies are a delightful twist on a classic treat, combining the rich, velvety flavors of red velvet cake with the charm of a classic spritz cookie. These vibrant, eye-catching cookies offer a soft, buttery texture with a hint of cocoa and a beautiful, festive color that makes them perfect for any special occasion or holiday gathering. Whether you’re serving them at a party, gifting them, or just indulging in a personal treat, these cookies are sure to make an impression.
This easy and fun recipe lets you enjoy the elegance of red velvet in a new, bite-sized form. You can customize them with a touch of cream cheese frosting, a sprinkle of powdered sugar, or even small decorative sprinkles for an extra pop of flair. Each cookie is a little burst of color, flavor, and nostalgia rolled into a delightful treat.
I’d love to see your Red Velvet Spritz Cookies! Share a photo on Instagram and tag me—I’d love to admire your creations. Don’t forget to leave a comment and let me know how you made these cookies your own, whether through creative decorations, flavors, or any fun twists you added!